
I like to sharpen eyes using two different methods:
Method 1:
Find your "dodge" tool on the lefthand side of your screen. It looks like a lollipop!

Click on the dodge tool. After doing so, go up to the top of your screen, and select a brush size. The brush should have a soft edge, and should be small enough to fit inside of your subject's iris (the colored part of the eye).

Next, find the box just to the right that says "range". Adjust your range to say "midtones" and your "exposure" to about 25%.

Now, you are ready to begin editing! Run the dodge tool over the white portion of each eye, as well as the iris of each eye. Be careful not to run over the pupil, or the black ring around the iris. We will adjust this in our next step.
Next, click on the "dodge" tool once more, and instead, select the "burn tool", which looks like a hand.

Adjust your brush size if necessary, but keep your range and exposure the same. Run the burn tool over the pupil of the eye, as well as the dark ring around the outside edge of the iris. The eyes of your subject should now look sharpened!
Method 2:
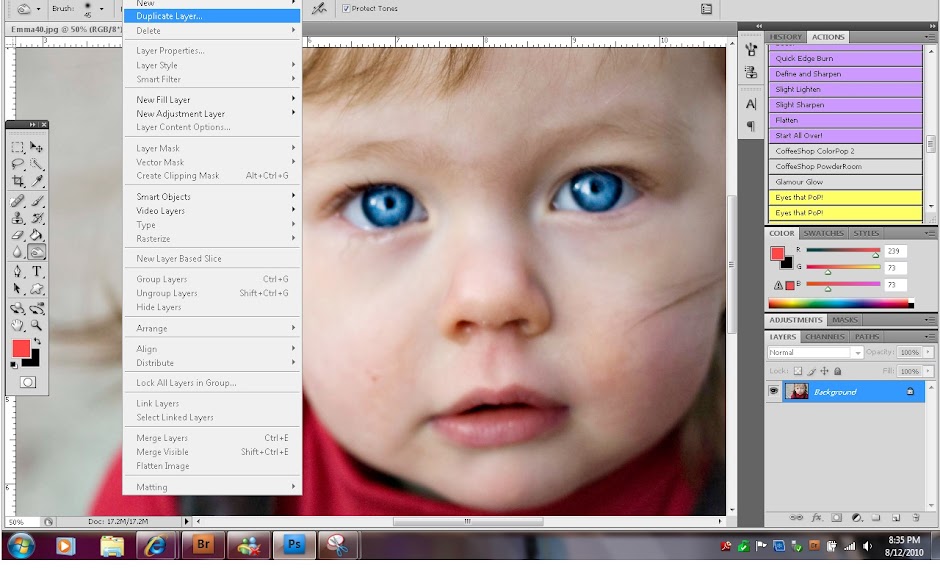
Now, I like to do one more step to sharpen eyes. This step will really make the eyes pop. Go to the top of your screen and select "Layer" and then "Duplicate Layer."
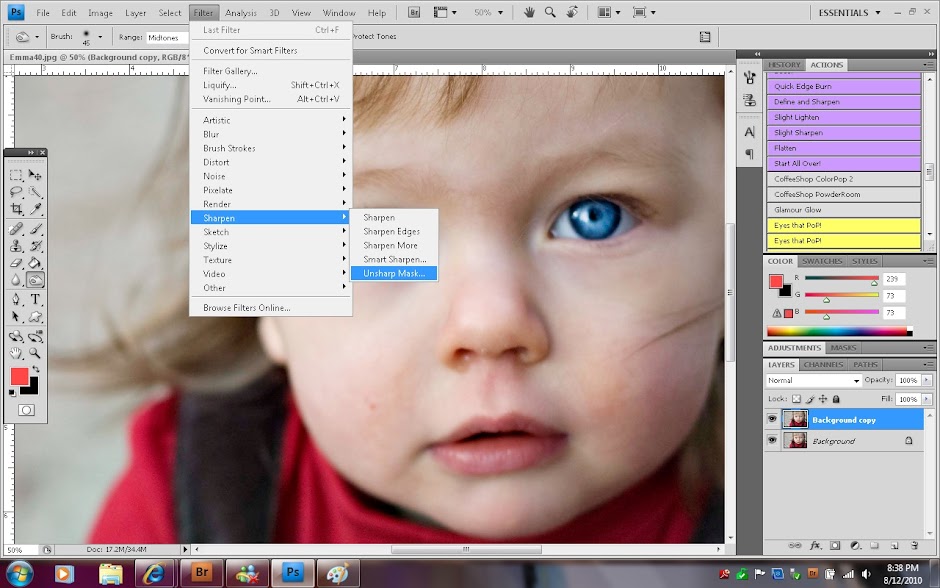
Next, go back up to the top of your screen and select "Filter", "Sharpen", and "Unsharp Mask".
It sounds crazy, but Unsharp Mask will actually sharpen your image. A box like the following will appear on your screen. I usually leave the Radius at 1 and the Threshold at 0. The Amount that you sharpen is really up to you. The greater the percent, the sharper it will be, but be careful not to oversharpen.
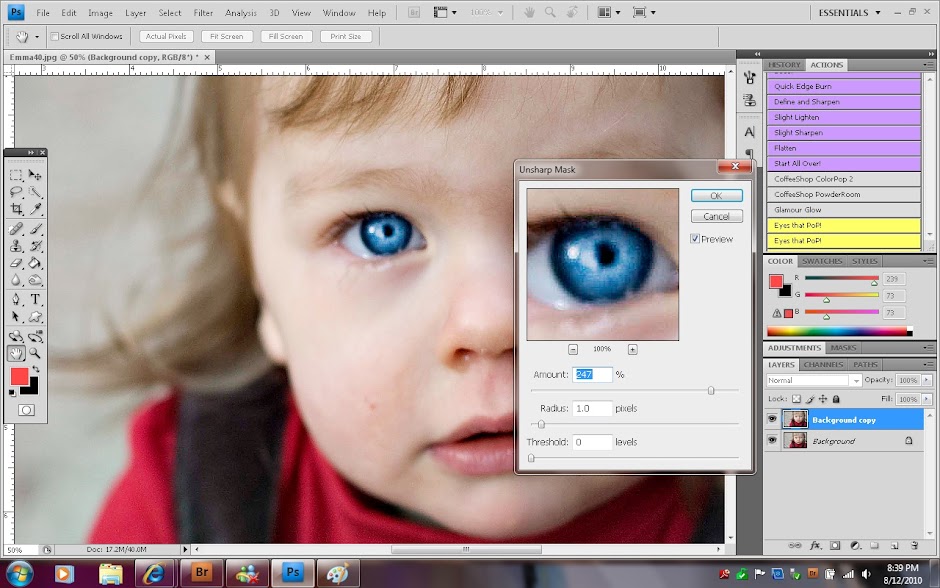
After sharpening, you will notice that your entire picture was sharpened. This is ok, but we are just going to sharpen the eyes for now because we want them to really stand out. So, how is that done?
Find the box on the lower right hand corner of your screen that has the list of layers.

Hold down the "alt" key and the key at the bottom of this box that has a circle inside of a square. Hold down these two keys at the same time. When you do, a black square should appear next to "background copy." The sharpening will also disappear from your picture.

Now, click on the paintbrush on the lefthand side of your screen, and make sure it is set to paint in white.

Now, you are going to use your paintbrush to paint over the eyes. I try to stay within the eye, being careful not to sharpen the outside of the eye too. When painting, make sure you use a soft brush that can fit inside of the eye, Mode set to Normal, and Opacity/Flow both set at 100%.
Before:

After:


 " alt="Photobucket" />" class="active" />
 " alt="Photobucket" />" border="0" alt="Photobucket" />"
 " border="0" alt="Photobucket" />" alt="Photobucket" />"


No comments:
Post a Comment